


Slideshow videos are a fantastic way to quickly turn boring images into an exciting piece of content. You compile images, add some music, some effects and you get an awesome video in minutes. It is popularly used for various use cases like marketing videos, invitation cards, celebration videos, and more.
Creating a slideshow video is pretty simple and straightforward with the UI based video editors. However, it gets repetetive and manual once you need to create more than one. That's where using Python to programatically create slideshow videos can be powerful and save you hours of work. Afterall, we Python users love to automate everything, don't we?
In this article, you will learn to programatically turn images into a slideshow video with background music using Python.
Prerequisites
- Python 3 or higher
- Shotstack API key Shotstack provides a cloud-based video editing API. Rendering videos is resource intensive and can take hours to edit and generate videos. Shotstack’s cloud editing-API infrastructure makes it possible to concurrently render multiple videos in minutes.
We will be using the Shotstack Python SDK for this tutorial. You can sign up for a free developer account to get your Shotstack API key.
Configuring basics
We have made the source code publicly available on the Shotstack Python demo repository. Check out this and other Python demos here.
git clone https://github.com/shotstack/python-demos.git
Install dependencies including the Shotstack Python SDK:
pip3 install -r requirements.txt
Set your API key as an environment variable (Linux/Mac):
set SHOTSTACK_KEY=your_key_here
or, if using Windows (Make sure to add the SHOTSTACK_KEY to the path):
set SHOTSTACK_KEY=your_key_here
Replace your_key_here with your provided sandbox API key which is free for testing and development.
Creating a simple slideshow video using Python
At the end of this tutorial, you will generate the following slideshow video using Python:
Importing required modules
Let’s import the required modules for the project. We will be using Shotstack Python SDK to edit and render our video. You can see this documentation page if you first want to learn about the SDK.
import shotstack_sdk as shotstack
import os

from shotstack_sdk.model.soundtrack  import Soundtrack
from shotstack_sdk.model.image_asset import ImageAsset
from shotstack_sdk.api               import edit_api
from shotstack_sdk.model.clip        import Clip
from shotstack_sdk.model.track       import Track
from shotstack_sdk.model.timeline    import Timeline
from shotstack_sdk.model.output      import Output
from shotstack_sdk.model.edit        import Edit
Configuring the API client
Let’s set up the client with the API URL and key. So we can check if SHOTSTACK_KEY was set correctly in the previous
step.
host = "https://api.shotstack.io/stage"

if os.getenv("SHOTSTACK_HOST") is not None:
    host =  os.getenv("SHOTSTACK_HOST")

configuration = shotstack.Configuration(host = host)

if os.getenv('SHOTSTACK_KEY') is None:
    sys.exit("API Key is required. Set using: export SHOTSTACK_KEY=your_key_here")

configuration.api_key['DeveloperKey'] = os.getenv('SHOTSTACK_KEY')

with shotstack.ApiClient(configuration) as api_client:
    api_instance = edit_api.EditApi(api_client)
Adding images for the slideshow
Let’s define an array of images to use in our slideshow. The images need to be hosted somewhere online and accessible via a public or signed URL. We will be using the following images from Pexels stock library. You can replace it with your own image urls.
images = [
          "https://shotstack-assets.s3.ap-southeast-2.amazonaws.com/images/realestate1.jpg",
          "https://shotstack-assets.s3.ap-southeast-2.amazonaws.com/images/realestate2.jpg",
          "https://shotstack-assets.s3.ap-southeast-2.amazonaws.com/images/realestate3.jpg",
          "https://shotstack-assets.s3.ap-southeast-2.amazonaws.com/images/realestate4.jpg",
          "https://shotstack-assets.s3.ap-southeast-2.amazonaws.com/images/realestate5.jpg"
          ]
Setting up the video layer
A clip is defined as a type of asset in Shotstack. We can configure different attributes like length and start time. The
clips variable below will be used to combine the list of clips, that are the images in this code. The start and
length are defined for each clip
clips  = []
start  = 0.0
length = 3.0
Adding audio to the slideshow
We use the SDK's Shotstack.Soundtrack model to set the audio file URL and a fadeInFadeOut volume effect. Learn more
about the soundtrack model here. Similar to images, you can add URL of the mp3. We will use one from Pixabay’s stock
library.
soundtrack = Soundtrack(
    src     = "https://cdn.pixabay.com/audio/2022/03/23/audio_07b2a04be3.mp3",
    effect  = "fadeInFadeOut",
    volume  = 1.0
)
Combining images to create a video
Let's use our images to create clips . We will iterate over the images
array and create clips, defining the start time, length, and default effect. We use the Shotstack.ImageAsset model to
set the image URL and the Shotstack.Clip model to create the clip playback properties and add them to our clips
array we set up earlier.
for image in images:
    imageAsset = ImageAsset(src = image)

    clip    = Clip(
        asset   = imageAsset,
        start   = start,
        length  = length,
        effect  = "zoomIn"
    )

    start = start + length
    clips.append(clip)
Slides begin immediately following the previous one. For the first image we default the start to 0 so it starts
playing right away. Each image will appear in the video for a duration of 3 seconds, which we defined earlier.
The zoomIn effect gives an effect to all the images. The following are all the motion effects you can use to enhance
your video slideshow:
- zoomIn - slow zoom in
- zoomOut - slow zoom out
- slideLeft - slow slide (pan) left
- slideRight - slow slide (pan) right
- slideUp - slow slide (pan) up
- slideDown - slow slide (pan) down
Adding the clips to the timeline
The Shotstack API follows many of the principles of desktop editing software such as the use of a timeline, tracks, and clips. Let’s create a timeline, which is like a container for multiple video clips which play over time. Tracks on the timeline allow us to layer clips on top of each other.
for image in images:
    imageAsset = ImageAsset(src = image)

    clip    = Clip(
        asset   = imageAsset,
        start   = start,
        length  = length,
        effect  = "zoomIn"
    )

    start = start + length
    clips.append(clip)
We now add the clips we just created to a track. Then layer the track on the timeline, along with the soundtrack. We use
the Shotstack.Track from the SDK and the Shotstack.Timeline:
Configuring output
Lastly, we configure the output format and add the timeline and output to
create an edit. We use the Shotstack.Output and Shotstack.Edit models.
output = Output(
    format      = "mp4",
    resolution  = "sd",
    fps         = 30.0
)

edit = Edit(
    timeline = timeline,
    output   = output
)
Sending the edit to the Shotstack API
Finally, we send the data to the video editing API for processing and rendering. The Shotstack SDK takes care of converting our objects to JSON, including our key to the request header, and sending everything to the API.
try:
    api_response = api_instance.post_render(edit)

    message = api_response['response']['message']
    id = api_response['response']['id']

    print(f"{message}\n")
    print(">> Now check the progress of your render by running:")
    print(f">> python examples/status.py {id}")
except Exception as e:
    print(f"Unable to resolve API call: {e}")
Final code
import shotstack_sdk as shotstack
import os

from shotstack_sdk.model.soundtrack  import Soundtrack
from shotstack_sdk.model.image_asset import ImageAsset
from shotstack_sdk.api               import edit_api
from shotstack_sdk.model.clip        import Clip
from shotstack_sdk.model.track       import Track
from shotstack_sdk.model.timeline    import Timeline
from shotstack_sdk.model.output      import Output
from shotstack_sdk.model.edit        import Edit

if __name__ == "__main__":
    host = "https://api.shotstack.io/stage"

    if os.getenv("SHOTSTACK_HOST") is not None:
        host =  os.getenv("SHOTSTACK_HOST")

    configuration = shotstack.Configuration(host = host)

    if os.getenv('SHOTSTACK_KEY') is None:
        sys.exit("API Key is required. Set using: export SHOTSTACK_KEY=your_key_here")

    configuration.api_key['DeveloperKey'] = os.getenv('SHOTSTACK_KEY')

    with shotstack.ApiClient(configuration) as api_client:
        api_instance = edit_api.EditApi(api_client)

        images = [
           "https://shotstack-assets.s3.ap-southeast-2.amazonaws.com/images/realestate1.jpg",
          "https://shotstack-assets.s3.ap-southeast-2.amazonaws.com/images/realestate2.jpg",
          "https://shotstack-assets.s3.ap-southeast-2.amazonaws.com/images/realestate3.jpg",
          "https://shotstack-assets.s3.ap-southeast-2.amazonaws.com/images/realestate4.jpg",
          "https://shotstack-assets.s3.ap-southeast-2.amazonaws.com/images/realestate5.jpg",
          "https://images.pexels.com/photos/2062426/pexels-photo-2062426.jpeg",
          "https://images.pexels.com/photos/2079246/pexels-photo-2079246.jpeg"
        ]

        clips  = []
        start  = 0.0
        length = 1.5

        soundtrack = Soundtrack(
            src     = "https://cdn.pixabay.com /audio/2022/03/23/audio_07b2a04be3.mp3",
            effect  = "fadeInFadeOut",
            volume  = 1.0,
        )

        for image in images:
            imageAsset = ImageAsset(src = image)

            clip    = Clip(
                asset   = imageAsset,
                start   = start,
                length  = length,
                effect  = "zoomIn"
            )

            start = start + length
            clips.append(clip)

        track = Track(clips = clips)

        timeline = Timeline(
            background = "#000000",
            soundtrack = soundtrack,
            tracks     = [track]
        )

        output = Output(
            format      = "mp4",
            resolution  = "sd",
            fps         = 30.0
        )

        edit = Edit(
            timeline = timeline,
            output   = output
        )

        try:
            api_response = api_instance.post_render(edit)

            message = api_response['response']['message']
            id = api_response['response']['id']

            print(f"{message}\n")
            print(">> Now check the progress of your render by running:")
            print(f">> python examples/status.py {id}")
        except Exception as e:
            print(f"Unable to resolve API call: {e}")
Running the script
Use the python command to run the script.
python3 examples/images.py
If the render request is successful, the API will return the rendered id which we can use to retrieve the status of the render.
For this, you can run a different script included in our sample repo:
python3 examples/status.py {renderId}
Replace {renderId} with the ID returned from the first command. Re-run the status.py script every 4-5 seconds until
either a video URL is returned or there is an error message.
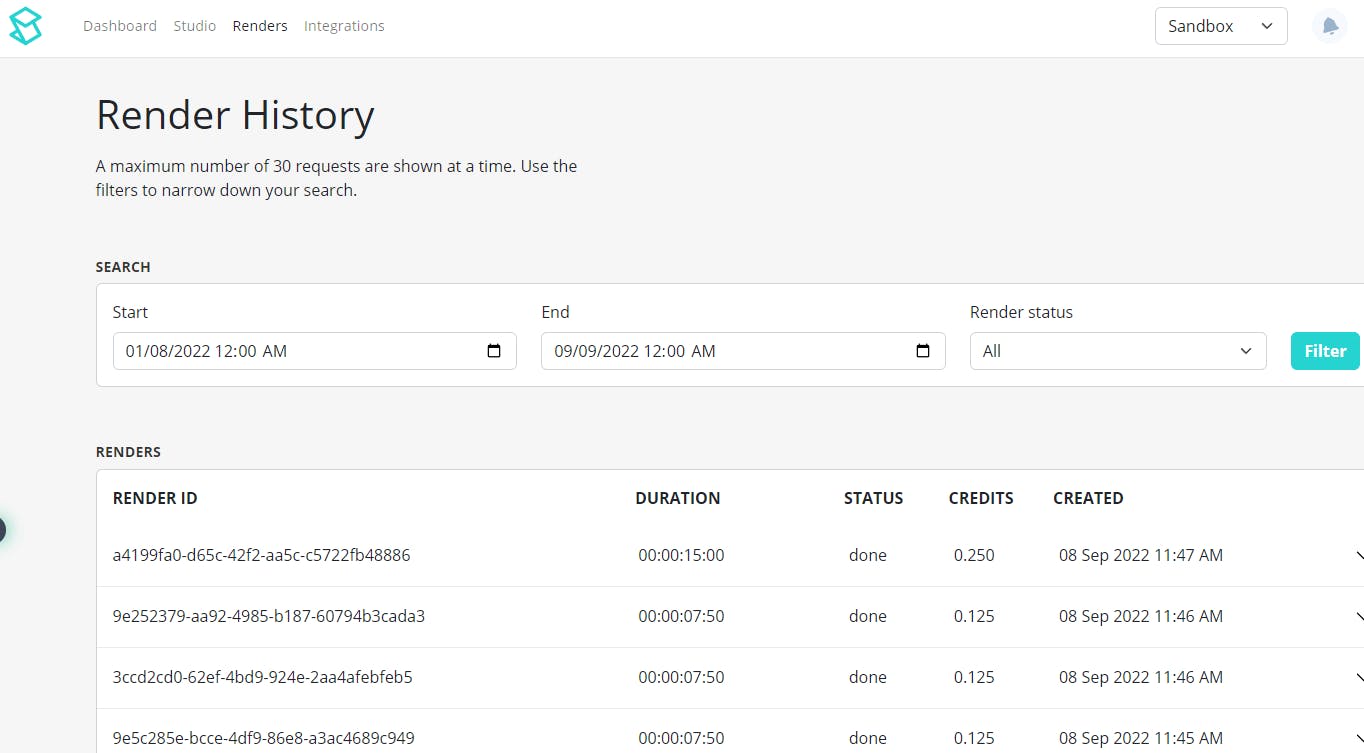
Accessing your rendered videos
You can view your rendered videos inside Shotstack dashboard under Renders. Videos on Shotstack servers will be deleted after 24 hours. You can additionally configure your custom destination like YouTube, Amazon S3, etc… Learn more about destinations here.
Final thoughts
This tutorial should have given you a basic understanding of how to programmatically edit and create multiple videos using Python and Shotstack video-editing API.
You can also add other dynamic assets like text, html tags, and more that can be programmatically replaced using
merge-fields.
This allows for a fully automated video editing process for different video use cases like real estate, automotive, marketing, sports highlights, etc… The Shotstack API architecture makes it effortless to integrate videos into your application. See our other learn articles on automating videos using Python.